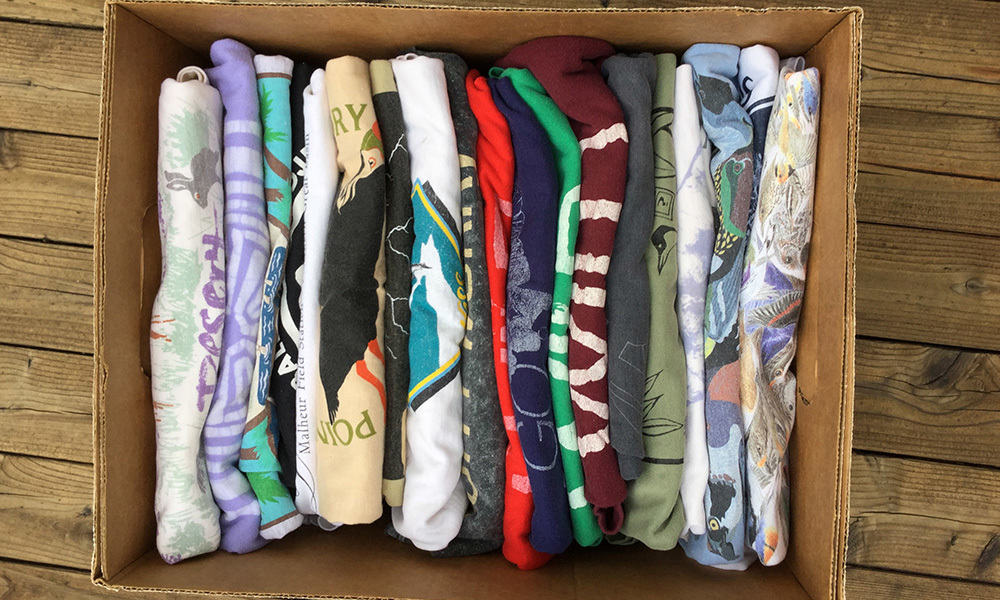
Step #1
Bring Your Box of T-Shirts to Me
If you are in the Bend area, you can bring them and meet me at a local quilt store. While there, you can choose and purchase the fabric for your new quilt. Then I’ll take the T-shirts and fabric and get started on your quilt! If you are not in the area, or just don’t have time, you may ship them to me.
Step #2
Creating A Rough Layout
This will give me a good idea of the finished size. I’ll also get a sense of how the “blocks” will flow. The idea is to create a pattern that keeps the eye moving.
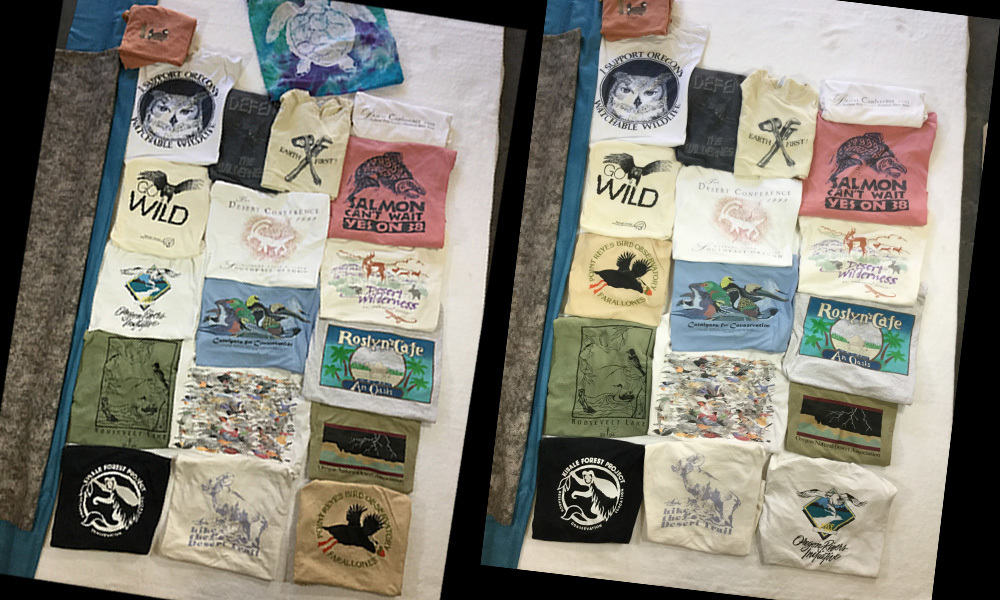
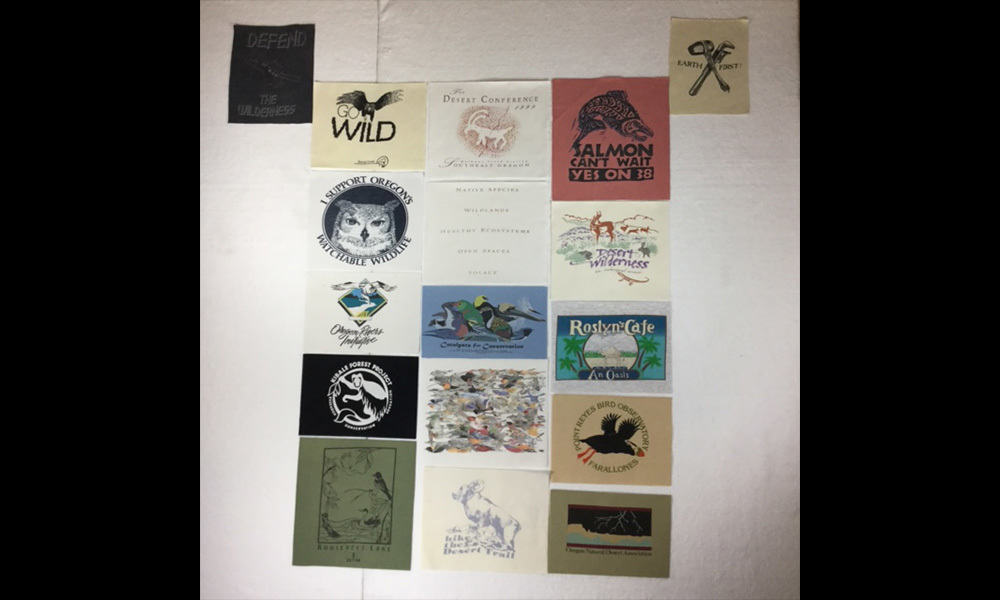
Step #2
Creating A Rough Layout
This will give me a good idea of the finished size. I’ll also get a sense of how the “blocks” will flow. The idea is to create a pattern that keeps the eye moving.
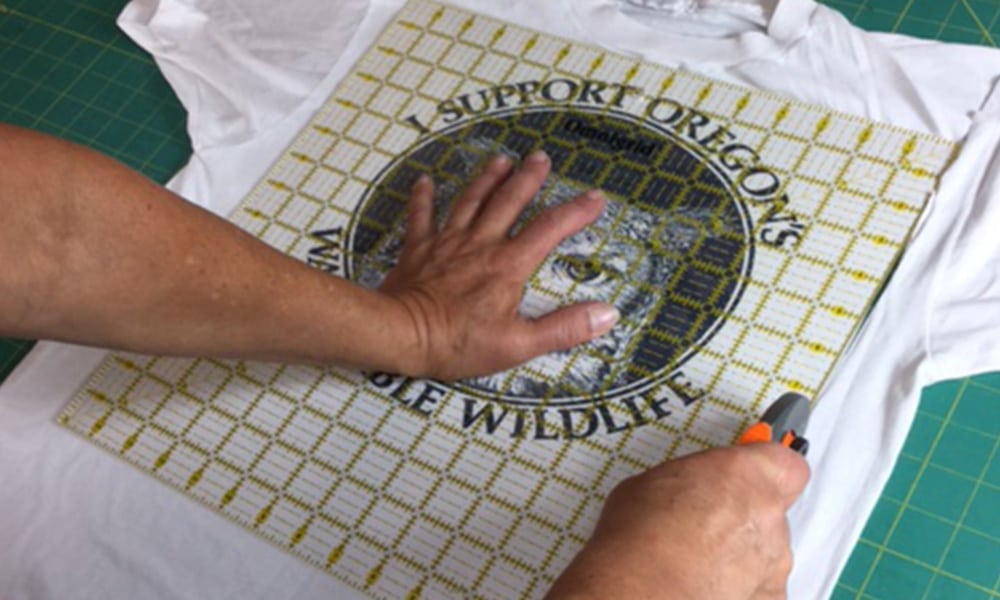
Step #3
Cutting The Shirts
I cut everything much bigger then it will end up, giving me room to trim down as needed. I use a gridded ruler so I can center and square up the logo design as much as possible
Step #4
Stabilizing The Shirt Squares
I use fusible interfacing. Not all other quilt makers do this, but in my opinion this step makes for a much better product. This gives strength to old or poor quality shirts and stabilizes small holes. The added strength allows me to make all my blocks straight and square. It also makes for a longer lasting quilt.
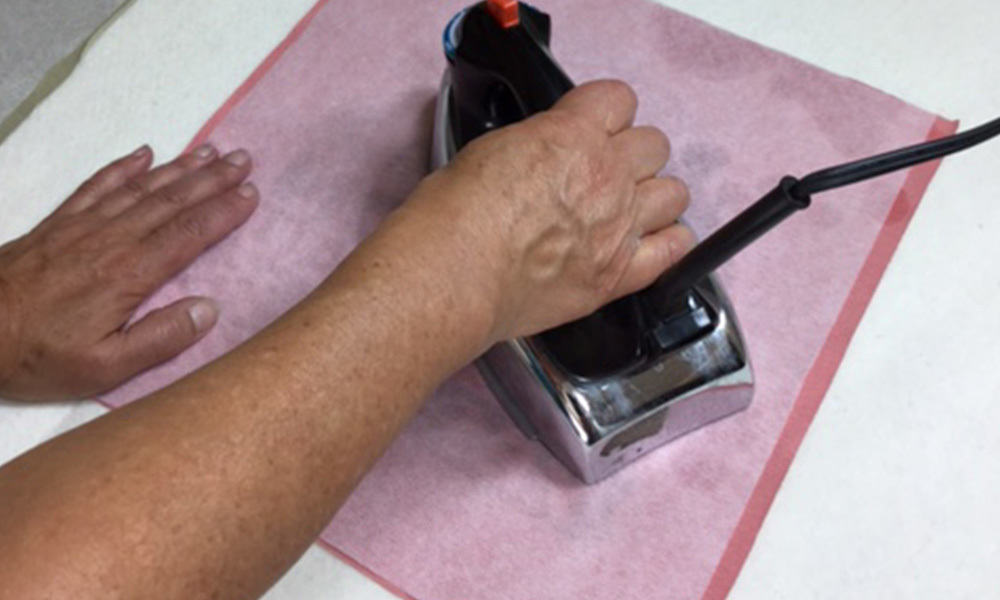
Step #5
Final Layout
It’s back to the design wall! This is where my layout work happens. As I work on the design I’m also trimming shirt blocks as I go. The idea is to make all the rows the same length, adding fabric as needed. The layout at this point may look different the the original.
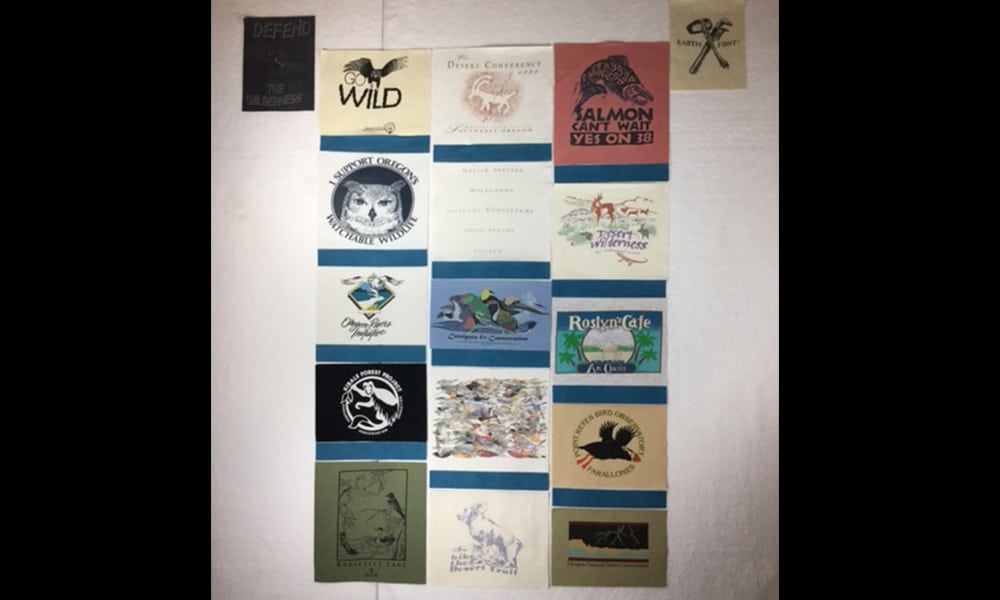
Step #6
Adding the Sashing
Before sewing, I place fabric between the T-shirt blocks to fill in the spaces.
Step #6
Adding the Sashing
Before sewing, I place fabric between the T-shirt blocks to fill in the spaces.
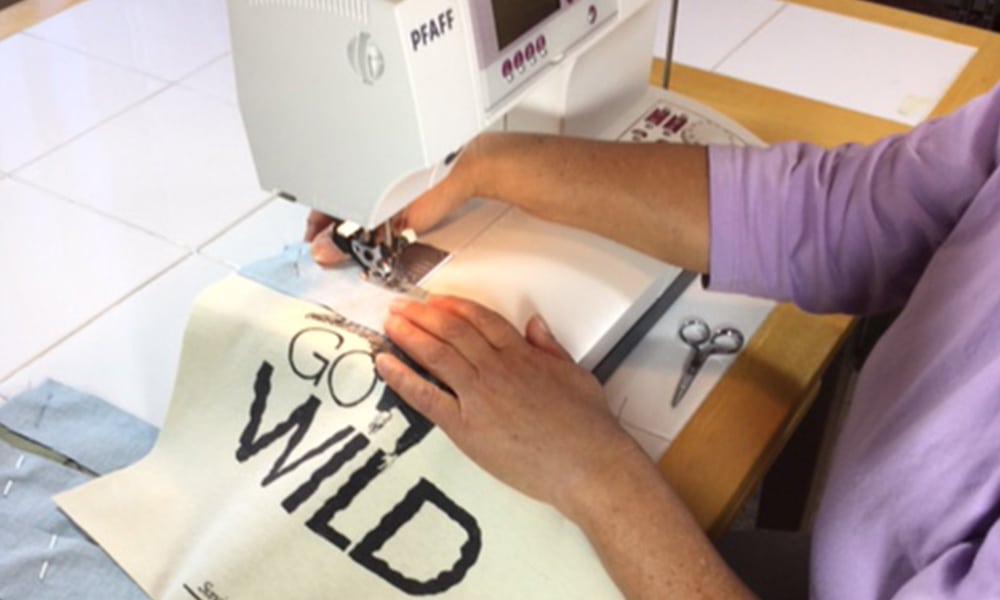
Step #7
Sewing
Now the fun part- sewing it all together! I carefully stitch each piece in place, making sure your memories will last a lifetime.
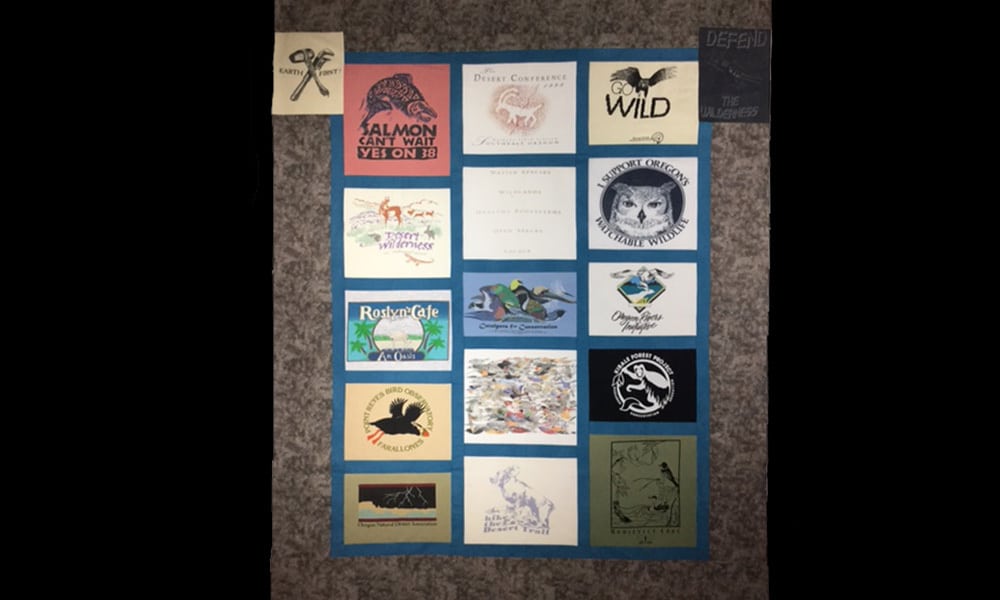
All in One Piece
The quilt top is now sewn together. Nearly finished!
Step #8
All in One Piece
The quilt top is now sewn together. Nearly finished!
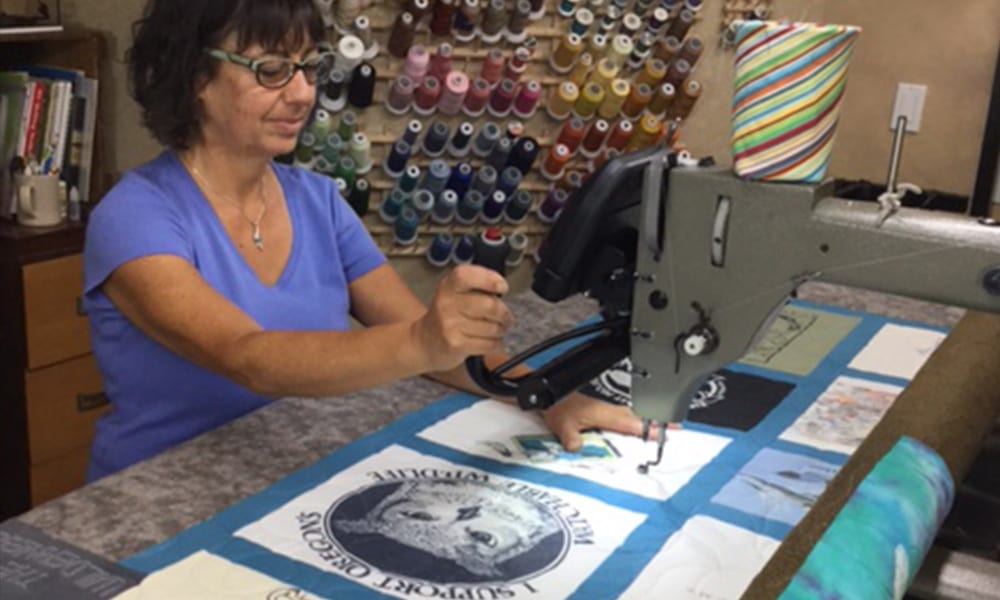
Step #9
Quilting
I do the quilting using a long arm sewing machine. I stitch a pattern over the whole quilt, allowing the shirt blocks be the focal point, not the quilting.
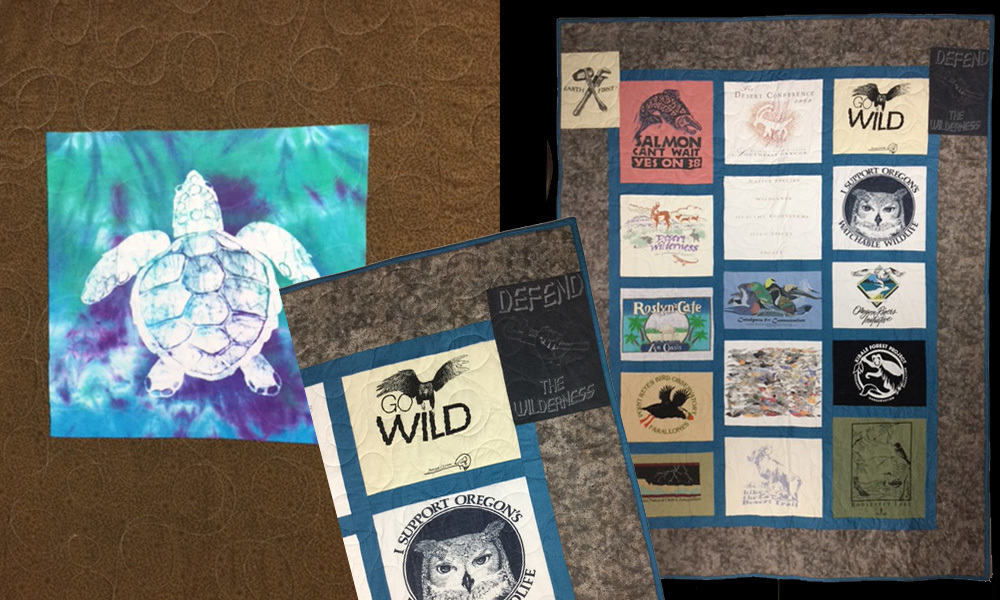
Step #10
Finished!
I’ve added the binding, and the quilt is done! This one had a large shirt which didn’t fit on the front, so I used it on the back.
Step #10
Finished!
I’ve added the binding, and the quilt is done! This one had a large shirt which didn’t fit on the front, so I used it on the back.